- [04-09]如何检测H7N9禽流感及预防?
- [08-31]LJC-70离子交换纯水器使用说明书
- [07-01]D2010W电动搅拌器使用说明书
- [07-01]H2004G电动搅拌器使用说明书
- [07-01]SH05-3恒温磁力搅拌器使用说明书
- [07-01]H2010G电动搅拌器使用说明书
- [07-01]H2025G电动搅拌器使用说明书
- [07-01]D2025W电动搅拌器使用说明书
- [07-01]D2015W电动搅拌器使用说明书
- [07-01]D2004W电动搅拌器使用说明书
- [12-15]硬度单位换算表,布氏洛氏维氏硬度换算公式
- [02-25]DDS-11A型数字电导率仪说明书
- [03-14]高效液相色谱仪操作步骤
- [07-08]电热蒸馏水器使用说明书
- [06-12]101系列电热鼓风干燥箱使用说明书
- [11-30]电子天平的使用方法
- [12-17]电导率和TDS浓度对照表转换表
- [09-24]游标卡尺如何读数
- [05-04]化学实验中玻璃器皿及实验耗材的使用介绍
- [08-13]在硬度中VpN是什么意思
MP系列电子天平英文说明书
|
|
Specifications
|
Model |
Weighing capacity (g) |
Readability (g) |
Repeatability≤(g) |
Linearity≤(g) |
Level indicate |
Below weighing |
RS232C |
|
MP1002 |
100 |
0.01 |
±0.01 |
±0.02 |
√ |
√ |
√ |
|
MP2002 |
200 |
0.01 |
±0.01 |
±0.02 |
√ |
√ |
√ |
|
MP3002 |
300 |
0.01 |
±0.01 |
±0.02 |
√ |
√ |
√ |
|
MP4002 |
400 |
0.01 |
±0.01 |
±0.02 |
√ |
√ |
√ |
|
MP5002 |
500 |
0.01 |
±0.01 |
±0.02 |
√ |
√ |
√ |
|
MP2000D |
2000 |
0.05 |
±0.05 |
±0.1 |
√ |
√ |
√ |
|
MP21001 |
2100 |
0.1 |
±0.1 |
±0.2 |
√ |
√ |
√ |
|
MP31001 |
3100 |
0.1 |
±0.1 |
±0.2 |
√ |
√ |
√ |
|
MP41001 |
4100 |
0.1 |
±0.1 |
±0.2 |
√ |
√ |
√ |
|
MP51001 |
5100 |
0.1 |
±0.1 |
±0.2 |
√ |
√ |
√ |
|
MP61001 |
6100 |
0.1 |
±0.1 |
±0.2 |
√ |
√ |
√ |
|
MP2001 |
200 |
0.1 |
±0.1 |
±0.2 |
ㄍ |
ㄍ |
ㄍ |
|
MP4001 |
400 |
0.1 |
±0.1 |
±0.2 |
ㄍ |
ㄍ |
ㄍ |
|
MP6001 |
600 |
0.1 |
±0.1 |
±0.2 |
ㄍ |
ㄍ |
ㄍ |
|
MP10001 |
1000 |
0.1 |
±0.1 |
±0.2 |
ㄍ |
ㄍ |
ㄍ |
|
MP12001 |
1200 |
0.1 |
±0.1 |
±0.2 |
ㄍ |
ㄍ |
ㄍ |
|
MP2000 |
2000 |
1 |
±1 |
±2 |
ㄍ |
ㄍ |
ㄍ |
|
MP4000 |
4000 |
1 |
±1 |
±2 |
ㄍ |
ㄍ |
ㄍ |
|
MP6000 |
6000 |
1 |
±1 |
±2 |
ㄍ |
ㄍ |
ㄍ |
|
MP10K |
10000 |
1 |
±1 |
±2 |
ㄍ |
ㄍ |
ㄍ |
Care and Maintenance |
Care and Maintenance
Clean
Though our products are made of high-quality materials, please clean the balance regularly to avoid corrosion on the surface.
Maintenance
Our maintaining engineer will do regular maintenance to your balance for longer using. Please contact us.
balance. See details in 4.3.
5.5 The weight readout changes constantly
Unstable weighing location (especially exposed to draft). Please reset your balance. See details in 2.3 4.3.
5.6 No display after tarring. Unable to tare.
Unstable weighing location (especially exposed to draft). Please reset your balance. See details in 2.3 4.3.
 occurred at weighing in percent, unload the balance, and operate according to 3.3.3.

Unplug the power adapter. Then plug in after 10 seconds.

When gross value <- 0, no tare.
5.2.5.1 Press “tare” key, tare.
5.2.5.2 Unplug the power adapter. Then plug in after 10 seconds.

Error occurs when receiving data through RS232C
5.2.6.1 Press “tare” key. If 
disappears, please check 4.4 again.
5.2.6.2 Unplug the power adapter. Then plug in after 10 seconds. Please check 4.4 again.
5.2.7 Value to be output cannot be shown on the display.
5.2.7.1 Error occurs in data communication. Please check 4.4.
5.2.7.2 The balance may be calibrated incorrectly (using calibration weight heavier than the standard), please re-calibrate your balance.
5.3 No display after power connection
Press “on/off” key.
5.4 After power connection and turning on the balance,
displayed in lower left corner indicates an unstable weighing location
5.4.1 Check below the weighing pan, see if it is touching any objects.
5.4.2 Strong drafts. Please reset the balance. See details in 2.3 4.3.
5.4.3 Unstable weighing location and stability range. Please reset your
balance. See details in 4.3.
5.5 The weight readout changes constantly
Unstable weighing location (especially exposed to draft). Please reset your balance. See details in 2.3 4.3.
5.6 No display after tarring. Unable to tare.
Unstable weighing location (especially exposed to draft). Please reset your balance. See details in 2.3 4.3.
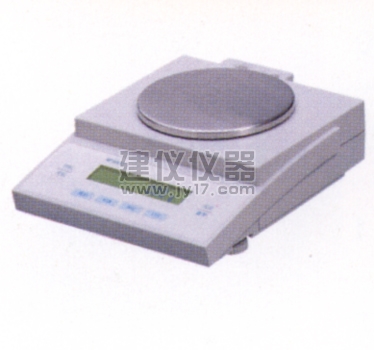
2 General Introduction
|
1.squared weighing pan |
2. rounded weighing pan |
|
3. level indicator |
4. DC jack |
|
5. pan support |
6. front leveling foot |
|
7. cover plate |
8. back leveling foot |
|
9. pan support |
10. weight display |
1.2.1 Display Modes


1 General Introduction
1.1 General Information
The MP series balances contain different weighing ranges to meet the
needs of different users.
The MP series balances have the following available features:
l Instant weight-display and great stability
l STN liquid crystal display
l AC/DC
l Great functions including piece count, toggling between units (g oz ct kg lb) and weighing in percent

5 Error codes
Please contact your sales department or us if your balance works wrongly.
Some problems can be solved immediately.

will be displayed.
Please contact us when this occurred.

CPU broken
Keyboard error
Storage lost
A/D model is not started
5.2 Errors occurred during weighing

Weight is too heavy.
5.2.1.1 Please decrease the weight
5.2.1.2 The balance may be calibrated incorrectly (using calibration weight lighter than the standard), please re-calibrate your balance.

Weight is too light
5.2.2.1 No sample is placed on the weighing pan. Or the weighing pan is not in place.
5.2.2.2 Check below the weighing pan, see if it is touching any objects.

Display capacity exceeded. Too little sample quantities.
5.2.3.1 If 
occurred at piece count, unload the balance, and operate according to 3.3.2.
14 Configuring the balance
please select 152. (Avoid such measurement if possible, because obvious mistake can occur)
4.4 Data communication
8051 MCU (Intel)
1 start bit
1 stop bit
7-bit ASCII (D6~D0)
1 parity (D7)
First setting <RS232 out put>
<Baud>
<Parity>
|
1 |
|
2 |
|
3 |
4 |
5 |
6 |
7 |
8 |
9 |
10 |
11 |
|
12 |
|
13 |
14 |
|
15 |
|
16 |
|
± |
|
Null |
|
Weighing Display |
|
Null |
|
Units |
|
CR |
|
LF | |||||||||
4.5 Quick weighing
<Adapting the balance to ambient conditions >
Please select 111 112
4.6 Exposed to strong drafts
Avoid strong drafts 114 126 127 128 129 141 211
4.7 Below Weighing
To open the below-balance port, remove the cover plate from the bottom of the balance.
1.2.2 Keyboard Introduction
On/Off key Tare key
Function key
(basic weighing / weighing in percent / piece count)
Calibration key
Weight units (g oz ct p kg) or sample quantity
(10 20 50 100 pieces ) selecting key
Print out key (through RS232C plug-in)
1.3 Warning and Safety
Please read chapter 2 carefully before operating the balance.
Do not expose the balance in dangerous places. The power must be AC220V 50Hz. Only 9V non-rechargeable / rechargeable batteries can be used in the balance. Do take out the batteries if not using the balance for long. Hardware inside the balance do not need maintenance and care. Please contact the sales department or us if your balance works wrongly.
1.4 Conventions
words darkened in this introduction indicates a certain equipment of the balance.
2 Installation and Calibration
Before choosing a location to set up your balance, observe the following:
---- Set up the balance on a stable, even, non-vibration surface
---- Avoid direct sunlight
---- Avoid great temperature change
---- Avoid strong drafts
The ideal location for weighing is suggested at the corner of a room, a stable, even surface where has no drafts from open windows or air conditions.
2.1 Unpacking the Balance and Checking the Equipment Supplied
The package includes:
|
---- Balance |
1 |
|
---- Certificate of quality |
1 |
|
---- Operating introduction |
1 |
|
---- Power adapter |
1 |
|
---- Weighing pan |
1 |
|
---- Calibration weight (table 1) |
1 |
Configuring the balance 13
|
Page |
Line |
Word |
Function |
Selections |
|
2 |
2 |
1 |
Baud |
300 |
|
2 |
2 |
2 |
600 | |
|
2 |
2 |
3 |
1200 | |
|
2 |
2 |
4 |
2400 * | |
|
2 |
2 |
5 |
4800 | |
|
2 |
2 |
6 |
9600 | |
|
2 |
2 |
7 |
19200 | |
|
2 |
3 |
1 |
Parity |
Mark |
|
2 |
3 |
2 |
Space * | |
|
2 |
3 |
3 |
Odd | |
|
2 |
3 |
4 |
Even |
4.3 Specifications of the Balance Operating Parameters
<Adapting the balance to ambient conditions>
Strong drafts 114
<Stability range>
For quick weighing or strong drafts, please select larger digit.
<Display >
Select your desired mode
<Remove the container>
Please operate carefully if you select 141
<Auto zero>
To do measurement ranging from a few to tens of digit around zero,
12 Configuring the balance |
4.2 Balance operating parameters
|
Page |
Line |
Word |
Function |
Selections |
|
1 |
1 |
1 |
Adapting the balance to |
Very stable conditions |
|
1 |
1 |
2 |
Stable | |
|
1 |
1 |
3 |
Unstable * | |
|
1 |
1 |
4 |
Very unstable | |
|
1 |
2 |
1 |
Ambient conditions Stability range |
0.25 digit |
|
1 |
2 |
2 |
0.5 digit | |
|
1 |
2 |
3 |
1 digit * | |
|
1 |
2 |
4 |
2 digit | |
|
1 |
2 |
5 |
4 digit | |
|
1 |
2 |
6 |
8 digit | |
|
1 |
2 |
7 |
16 digit | |
|
1 |
2 |
8 |
32 digit | |
|
1 |
2 |
9 |
64 digit | |
|
1 |
3 |
1 |
Display |
Display all decimal places * |
|
1 |
3 |
2 |
Not displaying the last decimal place | |
|
1 |
3 |
3 |
Display the last decimal place stability | |
|
1 |
3 |
4 |
Display all decimal places at stability | |
|
1 |
4 |
1 |
Remove the container |
Remove regardless of stability |
|
1 |
4 |
2 |
Remove at stability * | |
|
1 |
5 |
1 |
Auto-zero function |
Auto-zero on * |
|
1 |
5 |
2 |
Auto-zero off | |
|
2 |
1 |
1 |
RS232C output |
Print on request regardless of stability |
|
2 |
1 |
2 |
Print on request after stability * | |
|
2 |
1 |
3 |
Auto print no stoppable regardless of stability | |
|
2 |
1 |
4 |
Auto print not stoppable at stability |
Installation and Calibration 5
Calibration weight Table 1
|
Model |
Calibration weight | |||
|
none |
100g |
200g |
500g | |
|
MP2000D |
√ |
|
|
|
|
MP21001 |
√ |
|
|
|
|
MP31001 |
√ |
|
|
|
|
MP41001 |
√ |
|
|
|
|
MP51001 |
√ |
|
|
|
|
MP61001 |
√ |
|
|
|
|
MP2000 |
√ |
|
|
|
|
MP4000 |
√ |
|
|
|
|
MP6000 |
√ |
|
|
|
|
MP10K |
√ |
|
|
|
|
MP2001 |
√ |
|
|
|
|
MP4001 |
√ |
|
|
|
|
MP6001 |
√ |
|
|
|
|
MP10001 |
√ |
|
|
|
|
MP12001 |
√ |
|
|
|
|
MP1002 |
|
√ |
|
|
|
MP2002 |
|
|
√ |
|
|
MP3002 |
|
|
√ |
|
|
MP4002 |
|
|
√ |
|
|
MP5002 |
|
|
|
√ |
6 Installation and Calibration |
2.2 Setting up the Balance
2.2.1 Setting up with rounded weighing pan
Place first the pan support, then the weighing pan on the balance. Turn
the weighing pan lightly and make sure it does not touch the outside of the balance and turns smoothly.
Place the weighing pan on the four pan supports 
, make sure the pan is stable and the four pan supports totally hidden under the weighing pan.
Insert the plug of the AC adapter 
into the jack, and insert the other plug into a wall outlet. Press “on/off” key once. In the next 6 seconds, a self-test is performed. At the end of the self-test, a zero readout is displayed, and that means the balance is ready to operate.
The AC power: ≥20W 220V 50Hz.
Under very dry conditions, the outside of the balance may have static
electricity.
2.4 Leveling the balance
2.4.1 Leveling of balance with rounded weighing pan
Adjust the two front leveling feet until the bubble points to the middle of the level indicator.
4 Configuring the balance
4.1 Operating the configuring keys
You can only configure the balance before measurement.

is displayed
---- Few seconds later,
is displayed
Page line word
---- Word, line, page numbers are automatically displayed from 0 to a
number.
---- Exit to the last menu by each one press of “tare” key at “0”
readout ( word-line-page-weighing mode)
---- Enter the next menu by each one press of “tare” key at non- zero
readout (page-line-word)

indicates a certain function is on.
---- All functions are set on when produced. No need to set all the
functions. You can set some of the functions to meet your special
requirements.
10 Operating the balance |
1 cs = 1g
For piece count, press “unit” key once to select reference sample quantity: 10 20 50 100 pcs.
3.3.2 Piece count
Turn on the balance.
Place the container on the balance. (quit this step if no container is needed)
Tare the balance.
Place 10 20 50 100 sample pieces on the balance. Wait until the display is stabilized.
Operate according to 3.3.1, select the piece count mode.
3.3.3 weighing in percent
Turn on the balance.
Place the container on the balance. (quit this step if no container is needed)
Tare the balance.
Place the sample on the balance. Wait until the display is stabilized.
Operate according to 3.3.1,select the weighing in percent mode.
3.4 Outputting and Printing the Data
Press “print” key, the data will be output through the RS232C plug-in.
See details in chapter 4.
Installation and Calibration 7 |
2.4.2 Leveling of balance with squared weighing pan
First turn the two back leveling feet counter clockwise until they leave the weighing surface.
Then adjust the two front leveling feet until the bubble points to the middle of the level indicator.
At last, turn the two back leveling feet clockwise until they just touch the weighing surface.
2.5 Calibrating the Balance
For basic weighing, the balance must warm up for at least 5 minutes; For accurate weighing, the balance must warm up for at least 30 minutes.
You must re-calibrate the balance each time after you set it up in a different area or when ambient conditions change, especially the temperature.
2.5.1 Necessary situations to calibrate the balance :
---- Before the first measurement
---- After weighing for a period
---- Weighing location changed
---- The ambient temperature changed greatly
8 Installation and Calibration |
2.5.2 Calibration weight formats
Calibration test
|
Series number of the balance |
Calibration weight (g) |
Series number of the balance |
Calibration weight(g) |
|
MP2000D |
2000 |
MP2001 |
200 |
|
MP21001 |
2000 |
MP4001 |
200 |
|
MP31001 |
2000 |
MP6001 |
500 |
|
MP41001 |
2000 |
MP10001 |
500 |
|
MP51001 |
5000 |
MP12001 |
500 |
|
MP61001 |
5000 |
MP1002 |
100 |
|
MP2000 |
1000 |
MP2002 |
200 |
|
MP4000 |
2000 |
MP3002 |
200 |
|
MP6000 |
5000 |
MP4002 |
200 |
|
MP10K |
5000 |
MP5002 |
500 |
Unload the balance, press “tare” key when the display is stabilized. Then keep pressing on the “calibration” key for a while until the calibration weight is displayed and blinking, center the calibration weight on the weighing pan. After the display has stabilized, the deviation of the current readout from the target weight (in grams only) is indicated. Remove the calibration weight.
2.6 Inserting the rechargeable / non-rechargeable batteries

3 Operating the balance
3.1 Simple weighing
Turn on the balance. Self-test is performed.
Tare the balance.
Place the sample on the weighing pan after “zero” is readout.
After the display is stabilized, read the results.
3.2 Weighing using containers
Turn on the balance. Self-test is performed.
Place the container on the weighing pan.
Tare the balance.
Put in the sample. After the display is stabilized, read the results.
3.3 Weighing Mode Shifting
3.3.1 weighing mode selecting
Press “mode” key once. The balance can shift between basic weighing, piece count, and weighing in percent.
The available basic weight units are: g oz ct p kg and cs. Press “unit” key once to toggle between units.
1 oz = 31.1034768g
1 ct = 0.2g
1 p = 453.592375g
1 kg = 1000g

实验仪器
站内导航
如何付款
如何来访
运输及费用
友情链接
ENGLISH
集团网站
无锡建仪实验器材有限公司 地址:无锡市滨湖区蠡湖商务园35号 邮编:214125
电话:0510-85191518 传真:0510-85191517 邮箱:wx_jy17@163.com
版权所有,未经允许不得使用本站商标图片和文章
苏ICP备13061772号-3
![]() 苏公网安备 32021102001268号
苏公网安备 32021102001268号